How to connect Razorpay to Billune
Razorpay is by far the best gateway for accepting payments from Indian clients — lowest fees for domestic cards, UPI, netbanking, and wallets, all through one connection.
For any freelancer or studio serving Indian clients, Razorpay is the correct default: UPI is the dominant payment method in India (over 60% of digital transactions) and it's essentially free to send/receive. Card fees are ~2%, netbanking is ~1%, and Razorpay bundles all four methods (UPI, cards, netbanking, wallets) behind a single checkout your client sees.
Connecting Razorpay takes about 3 minutes — you'll copy a Key ID and Key Secret from your Razorpay dashboard and paste them into Billune. A webhook step at the end is optional but recommended for reliability.
- 01
Grab your API keys
In your Razorpay Dashboard, go to Account & Settings → API Keys (https://dashboard.razorpay.com/app/keys). Click Generate Key if you haven't yet. Copy the Key ID (
rzp_live_...orrzp_test_...) and the Key Secret. The Secret is only shown once at generation — keep a safe copy. - 02
Enter them into Billune
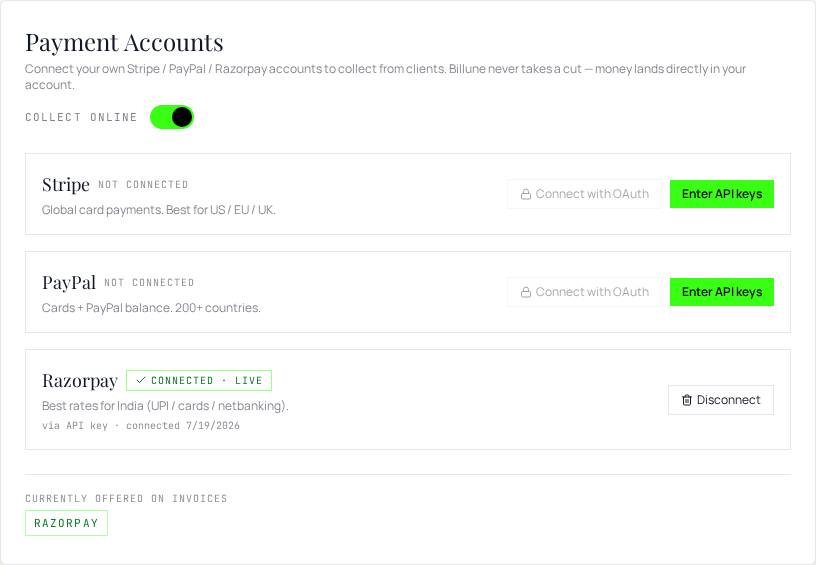
In Billune, go to Settings → Payment Accounts → Enter API keys on the Razorpay row. Paste both values and click Verify & connect. Billune pings Razorpay's Payments API to validate the credentials — success flips the row to Connected · LIVE.
- 03
Test with a small invoice
Create a small test invoice (₹1 works). Set the gateway to Razorpay in Branding → Actions. Send it to yourself → complete the Razorpay checkout modal → the invoice marks paid within seconds. Try both UPI and card in the checkout to confirm both flow through cleanly.
- 04
Register the webhook (recommended)
In the Razorpay dashboard, register a webhook at
https://billune.com/api/razorpay/webhookfor thepayment.capturedandorder.paidevents. Add the secret Razorpay generates as theRAZORPAY_WEBHOOK_SECRETenv var. This ensures payments still auto-mark even if the client closes the tab before returning — Razorpay pushes the confirmation server-side.